Welcome to the Stamp It Group Spring Fling Blog Hop! I know you will enjoy all of the cards and projects that we have created! You may have just come from Gianna’s blog. What a beautiful project!
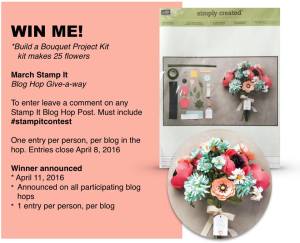
Don’t forget to enter into our giveaway. Details at the bottom of this blog.
Here is my project!
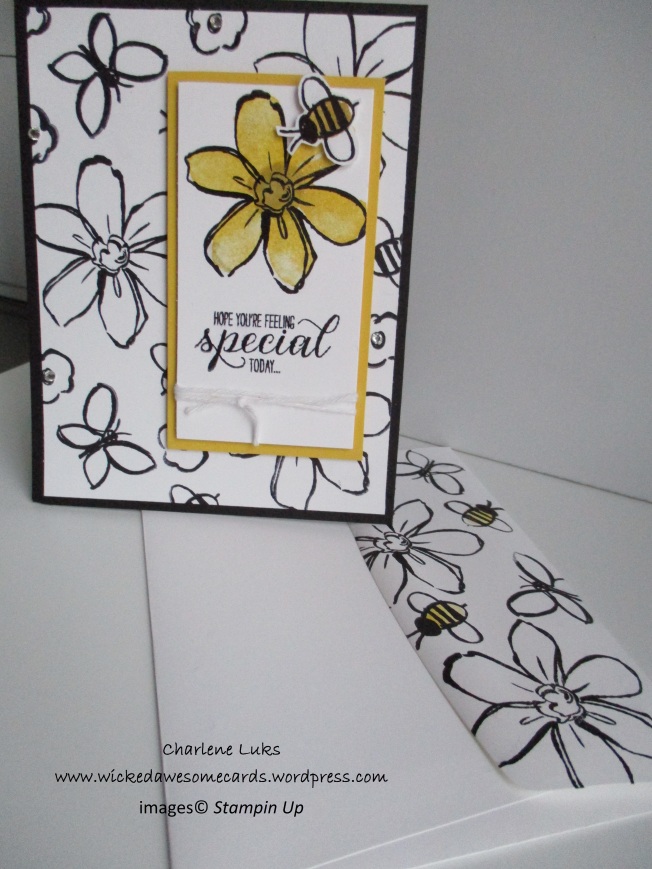
This card was so easy to create and it was pretty quick too.
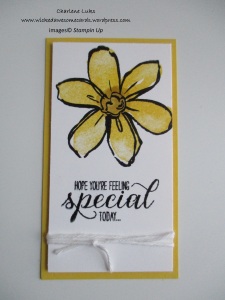
The base of my card is Basic Black and is cut at 4 1/4 ” by 11″ scored at 5 1/2″. I then cut two sheets of Whisper White cardstock at 4″ by 5 1/4″.(one is for the inside of the card) Using one of these pieces, I stamped randomly with the Garden In Bloom stamp set. I stamped in the Archival Black ink. I only used the outline images of the flower, butterfly, bee, and small flower in the set. I love how this creates your very own DSP. You could do this step on a big sheet of Whisper White and us the rest on another project. I then cut a piece of Daffodil Delight cardstock at 4″ by 2 1/4″ and a Whisper White piece at 3 3/4′ by 2″ for the focal piece.
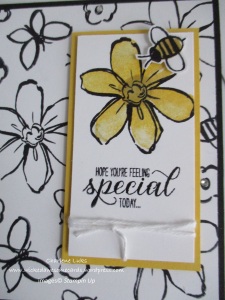
I stamped the larger flower outline image on the Whisper White cardstock towards the top and added the sentiment underneath with the Archival black ink. I stamped the fill-in part of the flower with Daffodil Delight ink and used Hello Honey for the center fill-in stamp.
I then stamped the cute little bumble bee image and filled in with Daffodil Delight also. I fussy cut out the bee and used a Stampin Dimentional to ahere to the flower. I tied some white bakers twine around the white cardstock three times and just tied with a knot. I then adhered it to the Daffodil Delight cardstock with more dimentionals. I then took this whole focal piece and adhered it to my stamped Whisper White piece.
Now, add your Whisper White piece to your base. All that’s left is to add a little bling. I added Basic Rhinestones to the centers of the small flowers on my stamped Whisper White piece and then used the Clear Wink of Stella glitter brush to color the large flower and the bumble bee that’s the focal piece on this card. Cute! Kind of hard to see in my picture, but it’s glittery…lol!
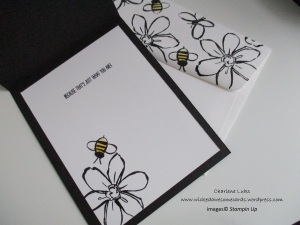
On the second piece of Whisper White cardstock I stamped the sentiment and the flower and bumble bee again and adhered with Tombow multi-purpose glue. And Voila, you are done! Love it!
For an extra-special touch I stamped the envelope flap for create a matching envelope. Can’t wait to send someone this gorgeous card.
I hope you give this card a try…it’s so easy to make! See below for my You Tube video on how to make this card.
Also, don’t forget to leave your #stampitcontest comment on this blog and all the blogs to be entered into the giveaway. This is an awesome kit!
Now you can continue on to Siara’s awesome blog by clicking on the link below! Happy Hopping!!!
BLOG HOPPERS
| 1. | Linda Cullen | |
| 2. | Tami White | |
| 3. | Elizabeth Jeanne | |
| 4. | Oksana Semenska | |
| 5. | Pam Nichols | |
| 6. | Bobbie Crouch | |
| 7. | Gianna Sardella | |
| 8. | Charlene Luks | That’s me! |
| 9. | Siara Acdal | |
| 10. | Lori Mueller | |
| 11. | Julie DeGuia |


Nice card! I like how you finished the inside and the envelope!
#stampitcontest
LikeLike
Thanks Barb!
LikeLike
Love the card and the stamp set! I think you just sold me the set! #stampitcontest
LikeLiked by 1 person
#stampitcontest. Thanks for sharing this great card with the clever background technique.
LikeLike
Anytime Denise!
LikeLike
Love it !!!
#stampitcontest
LikeLike
Thanks Diana!
LikeLike
Cute card! #stampitcontest
LikeLike
So pretty – thanks for the inspiration! #stampitcontest
LikeLike
This card stands out and is beautiful. You stampers really give us new and wonderful ideas for our cardsmaking. Please enter me in the Stampitcontest drawing.
LikeLike
Love this card!
#stampitcontest
LikeLike
I can feel the buzzzz of Spring!
#stampitcontest
LikeLike
me too!
LikeLike
So so cute, love it, really spriny! #stampitcontest
LikeLike
Thanks Rebecca!
LikeLike
I love your color choice. And I have the colors and set to do this one. Yahoo. #stampitcontest
LikeLike
Yay!!!
LikeLike
Nice step by step video! Thanks
I love this set! #stampitcontest
LikeLike
Love the bumble bee #stampitcontest
LikeLike
#stampitcontest
I love the card and the inside of it. Love black and yellow.
LikeLike
I watched the video you did and liked the way you explained every step. You make it fun to see and easy to do. Love the card and envelope was the finishing touch along doing the inside of card. Can’t wait until the next video. Thanks for sharing Charlene.
LikeLike
Thanks Joan!!!
LikeLike
#stampitcontest. Very cute and great tip to use stamps to make background paper. This could be great with botanical blooms stamps! Thank you!
LikeLike
Thanks Mary . Congrats on your winnings!
LikeLike
#stampitcontest Very nice card
LikeLike
This card is just too cute!! Love it! Especially how you used the stamps to make your own DSP. #stampitcontest
LikeLike
Thanks Chrystal!
LikeLike
Love, love, love your ideas and inspiration! #stampitcontest
LikeLike
Thanks Kathy!!
LikeLike
I love this card. I’m always drawn to black and white designs but love how you added a pop of color. The popped up bee is just fun! #stampitcontest
LikeLike
I don’t know why I haven’t ordered this awesome stamp set yet. Love this card. #stampitcontest
LikeLike
Love the colors. #stampitcontest
LikeLike
Such a lovely card!!
LikeLike
I LOVE TO SEE DIFFERENT PEOPLES IDEAS.
LikeLiked by 1 person
Oh my gosh, I love it!
#stampitcontest
LikeLike
Thanks Maggie!
LikeLike
I love the focal point and the contrast with the black and white. #stampitcontest
LikeLike
Glad you like it!!!
LikeLike
#stampitcontest very pretty card. I really like it.
LikeLike
Thank you!
LikeLike
This card is truly elegant. I enjoyed your tips and will try the tape on the inside piece. Thanks
#stampitcontest
LikeLike
Thanks Sally!
LikeLike
#stampitcontest love your card, I really love the bee… TFS hugs
LikeLiked by 1 person
That was very cute use of the stamps, the matching envelope was great as well! #stampitcontest
LikeLike
love making matching envelopes..it add that little touch of class…
LikeLike
Great card! I can almost hear the bee buzzing around the flower. Thanks for sharing a great video.
LikeLiked by 1 person
L#stampitcontestove those little bees!
LikeLike
me too…lol
LikeLike
#stampitcontest Love the little Bee!
LikeLiked by 1 person
#stampitcontest. Love this card. Cannot wait to make it
LikeLiked by 1 person
Love quick and easy cards. You nailed it. #stampitcontest
LikeLiked by 1 person
#stampitcontest
I really like your card. I have that stamp set and may have to recreate it
LikeLiked by 1 person
Love the video and your beautiful card. Thank you for sharing
#stampitcontest
LikeLike
your very welcome Vicenta!
LikeLike
Cute card. #stampitcontest
LikeLiked by 1 person
Such a cute card!
#stampitcontest
LikeLike
Thanks Terri!
LikeLike
I forget about black and yellow and how much I love those colors. Your card is gorgeous!
stampitcontest
LikeLike
Love being a part of this blog! Finding a bunch of new ideas! #stampitcontest
LikeLiked by 1 person
Very nice. Great contrast!
LikeLiked by 1 person
Love adding to the inside of the car. #stampitcontest
LikeLiked by 1 person
I love this..my favorite color is yellow…so i can see why your drawn to as well…makes me happy. .tfs..#stampitcontest
LikeLiked by 1 person
I like this card very much. Of course with spring comes bees. Just be careful but at least the stamped ones don’t hurt. LOL #stampitcontest
LikeLiked by 1 person
#stampitcontest
LikeLike
Cute spring card. I like to put bees on my cards also. #stampitcontest
LikeLiked by 1 person
#stampitcontest
Nice card
LikeLiked by 1 person
#stampitcontest
What a very nice spring card. And loving the bee.
LikeLike
Thanks Pat!
LikeLike