
Thanks for stopping by Team Stamp It’s Valentine’s Blog Hop!!
I know you are going to see some wonderful projects here. We have some very talented stampers in this group.
You have probably just come from Theresa Howe’s blog. Isn’t her project beautiful?
I have created a cute little box with the envelope punch board and filled it with chocolate to go along with a Valentine’s Day card I have designed for my daughter.

January 15 Team Stamp It Blog Hop
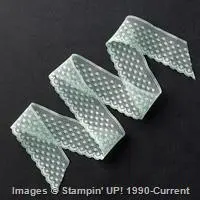
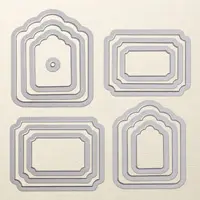
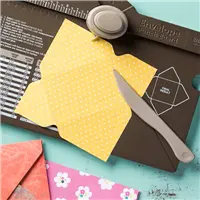
I cut a piece of Mint Macaron cardstock to 5 1/2″ by 5 1/2″ and punched and scored at 2″ and 3″ on the Envelope Punch Board. I turn it on all sides and punched and scored on the existing original score lines. I punched all corners using the corner punch on the envelope punch board. I used my bone folder on all score lines and secured the box with glue dots. I tied a piece of Mint Macaron Dotted Lace trim around box and secured with Whispher White bakers twine at the top. Using two of the framelits from the Tags and Labels framelit set, I created a cute tag for the front. I stamped the XOXO and the heart with stamps from Bloomin Love. Oh…lol..before you close up the box don’t forget to fill it with goodies!

What do you think of this card?
The colors remind me of the candy hearts you can get at Valentines Day time with the sayings on them!
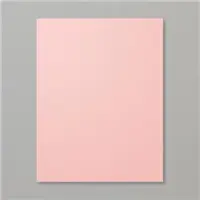
The card base is Blushing Bride cut at 8 1/2″ by 5 1/2″ scored at 4 1/4″. The second layer is Mint Macaron cut at 4″ by 5 1/4″.
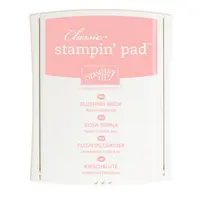
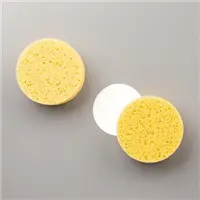
I sponged a piece of Shimmery White cardstock that measures 3 3/4″ by 5″ with Blushing Bride, Mint Macaron, Soft Sky and Daffodil Delight ink. I just sponged randomly, nowhere special.
 I then adhered the sponged piece to the Mint Macaron (slightly closer to the top than the bottom) piece and that piece to the Blushing Bride card base.

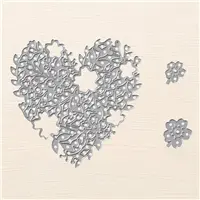
I cut the big heart from the Bloomin Heart Thinlits Dies using the Big Shot and the Precision Base Plate from another piece of Shimmery White cardstock measuring 3 7/8″ by 5 1/8″. Have you tried the Big Shot Die brush yet? It’s awesome! It worked perfectly to detach the heart from the cardstock and popped out all the little pieces so easily.
I then adhered the shimmery card stock onto the front of the card and fit the heart cutout back in. I adhered them all with Tombow Multi Purpose glue. It looks so pretty!

I cut some of the flowers from the thinlit set and sponged them with some of the same colors behind the heart and adhered them to the card with mini glue dots. I also added some Rhinestone Basic Jewels for some added glitz to the centers of the flowers. The sentiment was stamped with stamps from the Bloomin Love stamp set and cut out using the banner framelit from the Large Numbers Framelits Dies. Lastly, I then colored the flowers with my new favorite tool….the Wink of Stella Clear Glitter Brush…loving it!!!
I hope you enjoyed this project. Click on NEXT to move on to Oksana Semenska’s blog for another great project! (I want to make one!!!)
But don’t go away, Team Stamp It has another giveaway!!!!! Make sure to leave a comment on this blog and all the blogs on this hop and don’t forget to include #stampitcontest in your comment!!! Good Luck!!!

Thanks for stopping by!!! Happy Hopping!!!


Built for Free Using: My Stampin Blog


I am way, way behind times here! Lol I just discovered this stamp and die set while browsing Pinterest. Oh my! So, so beautiful. So…I hopped on Ebay and was able to order this bundle! I continued to look at all the lovely cards created with this set and fell in love with your card. Clicked on your website and here I am. Wanted to let you know how beautiful your card is. Hopefully I will be able to re-create it when my bundle arrives. 🙂
LikeLike
#stampitcontest.
Love the card with the matching box. So pretty!!
LikeLike
Just when I think there can’t be anything more beautiful that what I’ve already seen…this was fantastic! #stampitcontest
LikeLike
Pretty card, love the background. I noticed you don’t have the embossed mark that dies normally leave around. How did you accomplished that?
LikeLike
Hi Gisela…the Bloom in Love thinlit cuts out the heart that way..you don’t get an edge..one of the beauties of thinlits!!!
LikeLike
Oh! Such a lovely idea! #stampitcontest – Thanks and God bless! ILuvTheEucharist (at) aol.com
LikeLike
#stampitcontest
I love the sponged background, very creative! 🙂
LikeLike
Gorgeous projects. #stampitcontest
LikeLike
Oh my! Now I want this die. Until I saw this idea I had been able to resist. Beautiful and so very clever. #stampitcontest
LikeLike
Love the way you sponged the piece your heart die cut is layered on. Thanks for sharing.
#stampitcontest
LikeLike
Gorgeous and stunning — love every thing about it. #stampitcontest
LikeLike
#stampitcontest……this card is simply stunning! I really, really love it!!!
LikeLike
#stampitcontest…….This card is simlpy stunning! I really, really love it!!!
LikeLike
Pretty box, and love the card!
LikeLike
What a beautiful card!!!
LikeLike
STunning! Love the background and the idea of sticking the cutout back into the frame. Beautiful all around. Thanks for sharing! #stampitcontest
LikeLike
#stampitcontest – Love the soft look of this card.
LikeLike
WOW card for sure!
LikeLike
#stampitcontest. This is my favorite from the Occasions Catalog. Thanks for another great project idea.
LikeLike
Whoops, forgot #stampitcontest
LikeLike
So pretty. I’m gonna do this when I get my blooming bundle
LikeLike
Love the pastel colors. #stampitcontest
LikeLike
Gorgeous! #stampitcontest
LikeLike
Wow! Love your rainbow sherbet background and how you put the die cut back in place. Clever!!! #stampitcontest
LikeLike
this is utterly fantastic #stampitcontest
LikeLike
Love the background! #stampitcontest
LikeLike
Love how you did the background! #stampitcontest
LikeLike
This is so pretty. Your daughter will love it, I’m sure. #stampitupcontest
LikeLike
Very creative use of the heart die, just beautiful!
#stampitcontest
LikeLike
Beautiful card!! I want to CASE it!! #stampitcontest
LikeLike
I love the colors and your creativity you put into this card. #stampitcontest
LikeLike
what a beautiful card love the sponging!
thanks for sharing
Pam
#stampitcontest
LikeLike
Wower for sure… #stampitcontest
LikeLike
Oh My Goodness! This is so adorable! Great job
#stampitcontest
LikeLike